Presta or Schrader? How to Identify and Inflate Your Bike Valve
Identify Presta and Schrader bike valves by sight and touch, fit the correct pump head, inflate safely and diagnose common leaks with this practical UK guide.
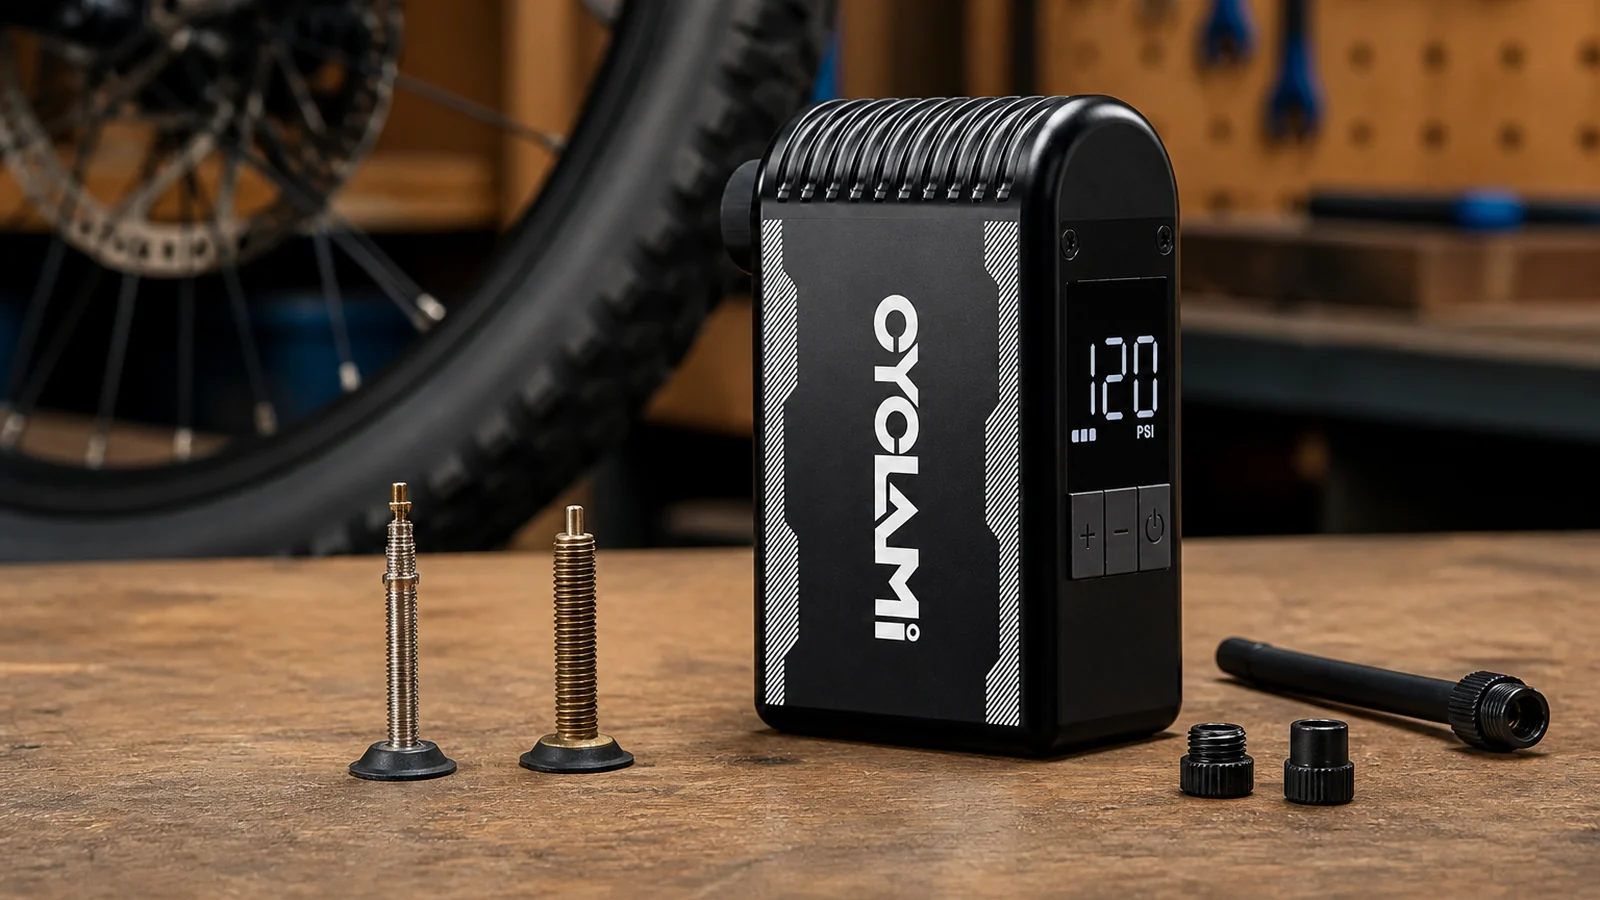
The quickest way to tell a Presta valve from a Schrader valve is to look at its width and tip. A Presta valve is slim and has a small threaded nut at the very top. A Schrader valve is wider, like a car tyre valve, and has a spring-loaded pin in the centre. Identify the valve before buying an inner tube or fitting a pump: the wrong head may not seal, and forcing it can damage the valve.
Cycling UK’s Essential Tools guide gives a sound starting point: read the size from the tyre sidewall, identify whether the wheel uses Presta or Schrader, and buy a matching tube. It also recommends carrying a dual-valve or smart-valve pump. This prevents a spare tube fitting the tyre but not the rim or pump.
Presta and Schrader at a glance
| Feature | Presta | Schrader |
|---|---|---|
| Body | Narrow, usually metal and often threaded | Wider, usually rubber-covered at the base |
| Tip | Small knurled locknut on a thin threaded stem | Recessed metal pin in the centre |
| How it opens | Loosen the top nut, then air pressure or the pump opens it | Pump head presses the centre pin |
| Commonly found on | Road, gravel and many hybrid or mountain bikes | Children’s bikes, utility bikes, some mountain bikes and many trailers |
| Rim hole | Smaller | Larger |
| Familiar comparison | Distinctive bicycle valve | Same basic pattern as a car tyre valve |
Remove the dust cap. A Presta valve ends in a tiny finger-operated nut; a Schrader opening reveals a pin below its rim. Pressing the Schrader pin releases air, but you need not press it merely to identify the valve. Wipe off grit before fitting a pump and inspect where the stem meets the tube for cracking.
How to inflate a Presta valve
Presta valves need one extra step. Work gently because the narrow stem can bend under sideways force.
- Rotate the wheel until the valve is easy to reach, supporting the stem on a child’s bike or a nearly flat tyre.
- Remove the dust cap.
- Turn the small nut at the tip anticlockwise until it stops. Do not try to remove it from the stem.
- Briefly press the loosened tip. A short hiss confirms that it is free.
- Select the Presta opening or setting on the pump head. Push or screw the head on straight, following the pump maker’s instructions, then lock its lever if it has one.
- Inflate for the tyre, rider, load and conditions. Treat the sidewall range as limits, not an instruction to use the maximum. Our guide to road-bike tyre pressure in UK conditions explains the variables.
- Unlock the pump head and remove it straight off. Avoid levering it from side to side.
- Turn the little top nut clockwise until it is finger-tight, then replace the cap.
The larger Presta nut at the rim steadies the stem; it does not seal the tube. Keep it no more than finger-tight. Overtightening can stress the valve base, especially if an underinflated tyre creeps.
How to inflate a Schrader valve
A Schrader has no top nut. Its centre pin is held shut by a spring and air pressure; the correct pump head depresses it while sealing around the valve.
- Remove the dust cap and check that the valve is straight and clean.
- Select the Schrader opening or setting on the pump. It is normally the larger opening on a reversible head.
- Press the head on squarely, then operate its locking lever. If air rushes out, remove it and check the setting rather than forcing it.
- Inflate gradually while watching the gauge. Stop at the pressure chosen for the tyre and load.
- Release the lever and pull the head off promptly and straight. A tiny hiss from the pump head is normal; a long hiss from the tyre is not.
- Replace the cap to keep grit and water away from the core.
A household with adult, children’s and utility bikes may have both types. A labelled dual, reversible or smart head avoids guesswork. The portable electric bike-pump guide covers other family-pump checks.
Make sure the pump head actually fits
Pump heads vary: two labelled holes, a reversible rubber insert, automatic detection or a screw-on hose with an adaptor. Read the markings and instructions rather than judging by force.
A correct connection feels square and stable; the gauge rises and air does not pour from the joint. Stop if the head wobbles, strikes the rim or needs sideways force. Check for the wrong opening, a worn seal, too little exposed stem or a missing adaptor.
For one attributed example, the CYCLAMI A2S is specified by its manufacturer as a 120 PSI mini electric pump, and CYCLAMI provides A2S valve-use instructions. Identify the valve and fit the interface or adaptor exactly as the current manual shows. This is a compatibility example, not a claim that one connector fits every valve unchanged. See the CYCLAMI A2S product page for the supplied configuration, and test any portable inflator at home first.
Rim holes, valve length and deep rims
The wheel also limits which valve can be used. A Schrader stem needs a larger rim hole than a Presta stem. Do not drill or enlarge a bicycle rim to make a Schrader valve fit. Drilling can weaken the rim, damage its finish and create sharp edges that cut a tube. Use a tube with the valve type intended for the wheel, or ask a qualified cycle mechanic to identify the correct replacement.
A Presta tube can sometimes pass through a rim drilled for Schrader, but the loose fit may leave the stem poorly supported. Use only a purpose-made reducing grommet or washer approved for that rim and tube arrangement. The safer default is the original valve type.
Valve length matters too. Standard-depth rims need only a modest amount of exposed stem, whereas deep-section rims require a longer Presta valve or a compatible extender. There must be enough straight stem for the pump head to seal without striking the rim. Before ordering a tube, measure the rim depth and compare valve lengths. With an extender, follow its sealing instructions and confirm that the valve can still be opened, closed and serviced.
When an adaptor helps
A small Presta-to-Schrader adaptor screws over an opened Presta valve and lets a Schrader pump head connect. It is useful when a family pump has only a Schrader head or as a compact backup in a saddlebag. Remove it after inflation if it prevents the Presta nut or dust cap being closed correctly.
An adaptor changes the mechanical connection; it does not make an unsuitable compressor safe. High-volume airline or forecourt equipment can inflate a bicycle tyre extremely quickly, may have a gauge intended for car pressures, and may not seat neatly on a small wheel. A controlled bicycle pump with a readable gauge is the better choice.
Why a valve leaks after inflation
First establish where the air is escaping. Put a little mild soapy water around the valve tip, removable core and base. Growing bubbles identify the leak; wipe and dry the area afterwards.
- Leak at a Presta tip: check that the top nut is finger-tight. If the removable core itself has loosened when a screw-on pump was removed, use the correct core tool to nip it up gently. Not every Presta valve has a removable core.
- Leak at a Schrader centre: a speck of grit may be holding the core open. Briefly press and release the pin, then retest. A damaged or persistently leaking core can be replaced with a valve-core tool, but deflate the tyre first.
- Leak around the pump connection: confirm the head is on the correct setting, inspect its rubber seal and reconnect squarely. A screw-on head can sometimes unscrew a removable Presta core; check that the core is secure before the next ride.
- Leak where the stem meets the tube: replace the tube. A torn valve base is not a dependable roadside repair. Check tyre pressure and rim-tape condition so the same stress does not recur.
- Valve disappears into the rim: fully deflate, unseat one side of the tyre if necessary and reposition the tube without twisting it. Do not pull a deeply recessed valve out by tightening the rim nut.
If inflation repeatedly fails, fit a known-good matching tube or take the wheel to a cycle shop. The bikepacking mini-pump guide explains why a small manual backup remains useful even when an electric pump is carried.
What about Dunlop or Woods valves?
Some older British utility bikes and imported European or Dutch-style cycles use a Dunlop valve, also called a Woods valve. Its body is broadly similar in diameter to Schrader, but it does not show the same recessed spring-loaded centre pin. Depending on the insert and pump, it may inflate with a Presta-compatible head, but do not assume. Identify the valve or take the wheel to a bike shop before buying a tube or adaptor.
For most UK riders the decision remains simple: narrow stem plus top nut means Presta; wide car-style stem plus centre pin means Schrader. Match the tube to both the tyre size and rim, match the pump head to the valve, and practise the connection at home. That five-minute check is far easier than discovering the wrong spare or pump beside the road.